A good image worth 1000’s of words and its a key factor for any kind of WordPress posts to attract more audiences and helps you gain more social shares. But unfortunately prior to 3.5 version onwards, WordPress core developers who withdraws custom media upload folder option due to various security issues.
In my perspective, its much needed functionality for any CMS including WordPress. Here is screenshot which illustrates that how media folder location settings appears in WordPress 3.5 as well as 3.4 and lower versions.
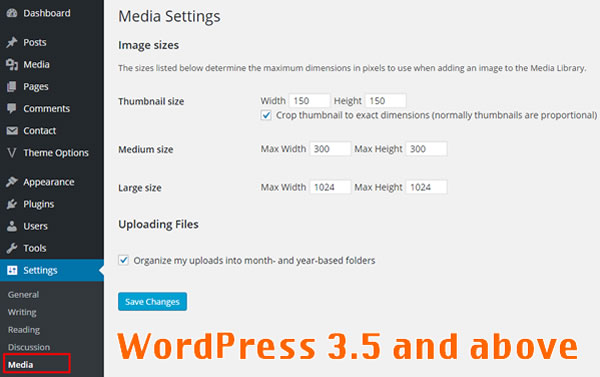
WordPress Media Folder Settings 3.5 and Above Versions

Media Folder Settings for WordPress 3.4 and Lower Versions
Importance of custom media upload folder
By default WordPress stores its media content such as images, videos and audio files in /wp-content/uploads/year/month folder hierarchy. To manage the media files using default hierarchy bit tricky and need to navigate year and month folders to manage them. Due to various technical reasons such as hosting media files in sub domain and CDN services needs custom media location to handle them smoothly.
Unfortunately there is no built-in option to setup custom media folder location prior to WordPress 3.5 and above versions. But no worries, here is the simple steps about how to reconfigure and change WordPress media folder location however you want.
There are couple of ways to change the default media upload folder location in your WordPress installation.
Method 1
First one is hacking your wp-config file by adding small snippet which contains custom media folder path. Open your wp-config file in your WordPress installation and add the below specified snippet just after the <?php tag. For example if you want to relocate your media upload folder from…
www.sitename.com/wp-content/uploads/year/month/img_path.jpeg
to
www.sitename.com/media/img_path.jpeg
then you need to add below specified snippet in your wp-config.php file and you may disable the check box if you don’t want organize your uploads into month and year-based folders.
define( 'UPLOADS', ''.'media' );
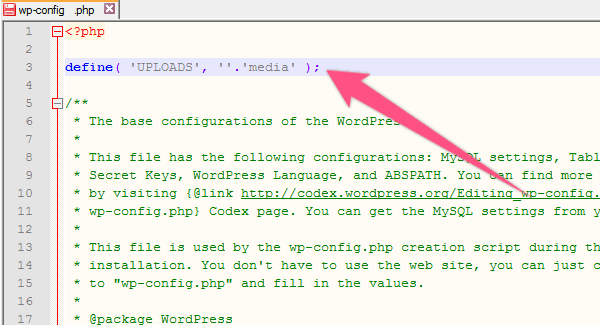
Add Snippet to wp-config.php File
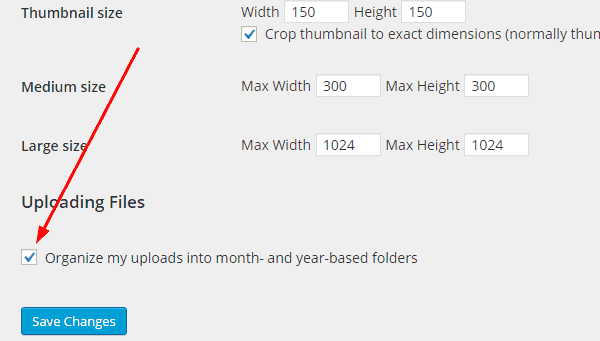
Disable Year and Month Based Folders
If you want to host your media folder in sub-domain instead of sub-folder, then use the following snippet in your wp-config.php file.
define( 'WP_CONTENT_URL', 'http://cdn.domainname.com/media' );
define( 'WP_CONTENT_DIR', $_SERVER['HOME'] . '/cdn.domainname.com/media' );
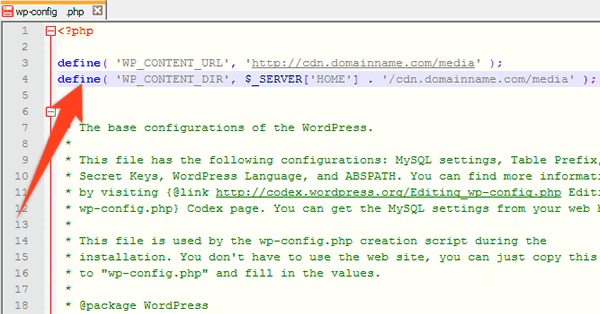
Snippet for Sub-Domain Media Hosting
Probably you may not like your users to access your image folders. To protect browsing your image folder, upload the blank index.php file along with .htaccess file which contains below snippet to block browsing your image folder in both cases either you host media files in sub-folder or sub-domain.
Options All -Indexes
Method 2
If you hesitate to modify your wp-config.php file, there is an another way by installing WP Original Media Path WordPress plugin does the trick in simple steps. Simply installing above specified plugin via WordPress plugin installer and activate it.
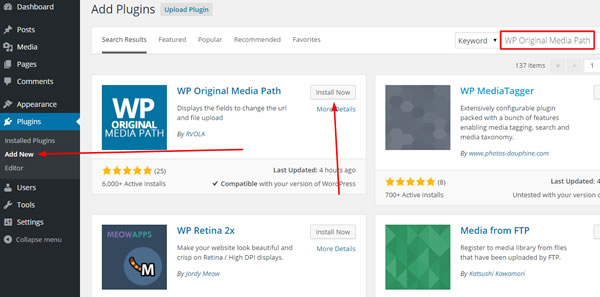
Install WP Original Media Path
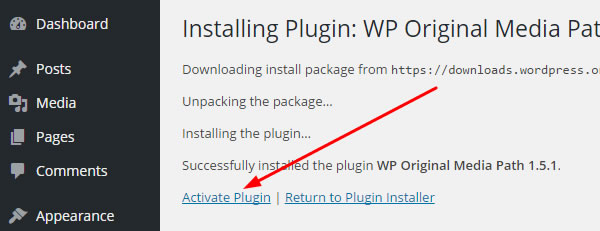
Activate WP Original Media Plugin
Navigate to Settings > WP Original Media Path
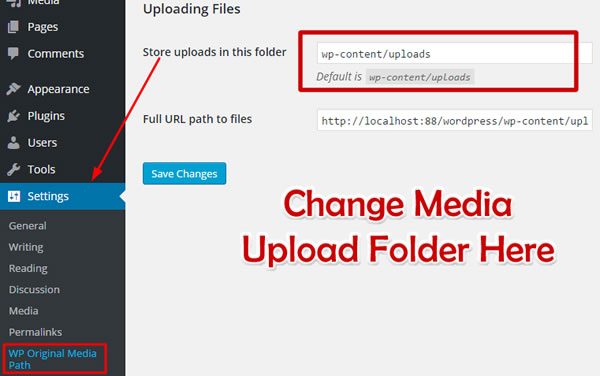
WP Original Media Path Settings
Boom, Now you may able see the WordPress default media upload folder path and now you have full freedom to relocate your media upload folder into your preferred location wherever you want.
If you experience any issues in the above article, do not hesitate to post your questions and opinions using below comment form.